Ubuntu 24.04 Printer Installation
- Install the smbclient package: open a terminal and run sudo apt install smbclient
- Open the CUPS administration page at https://localhost:631

- In the top menu, click Administration. You will be asked for a username and password. Provide the credentials for a local admin account.
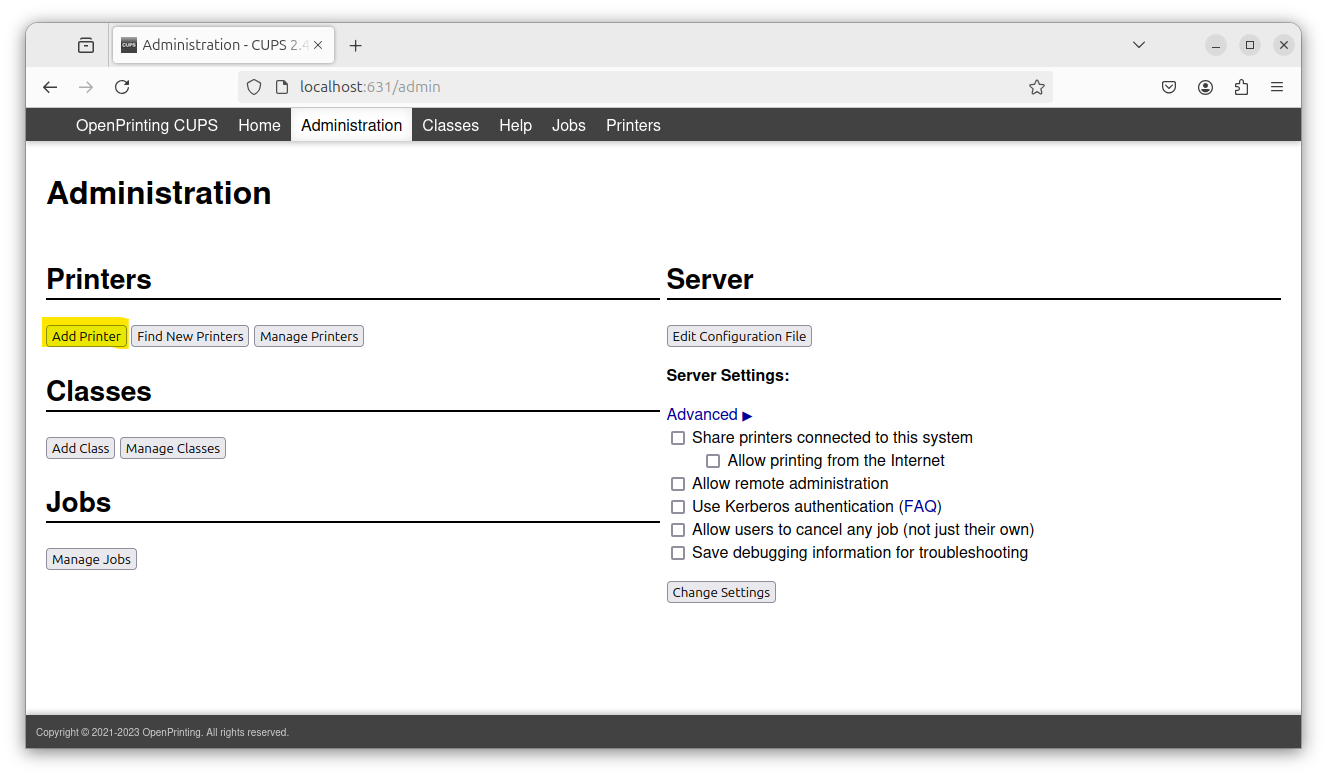
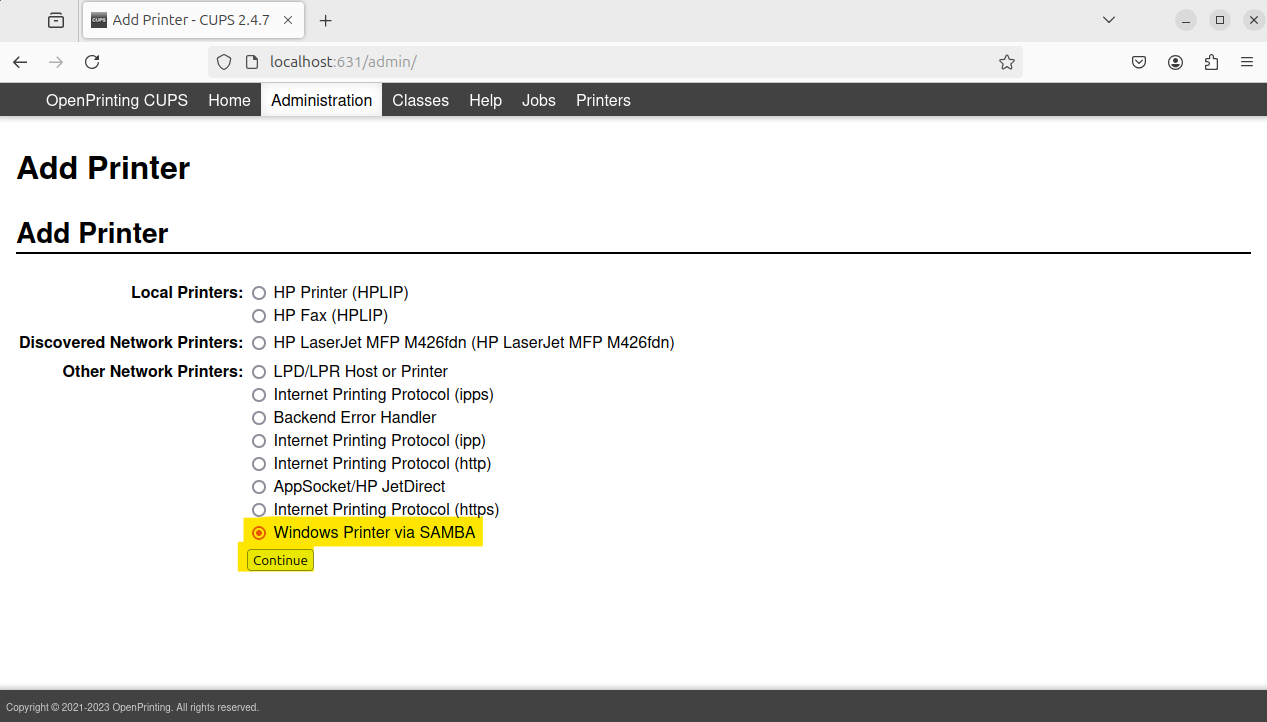
- Click the Add Printer button. In the Other Network Printers list, select Windows Printer via SAMBA. If you don't see a Windows Printer via SAMBA option then you need to install the smbclient package (see step 1).
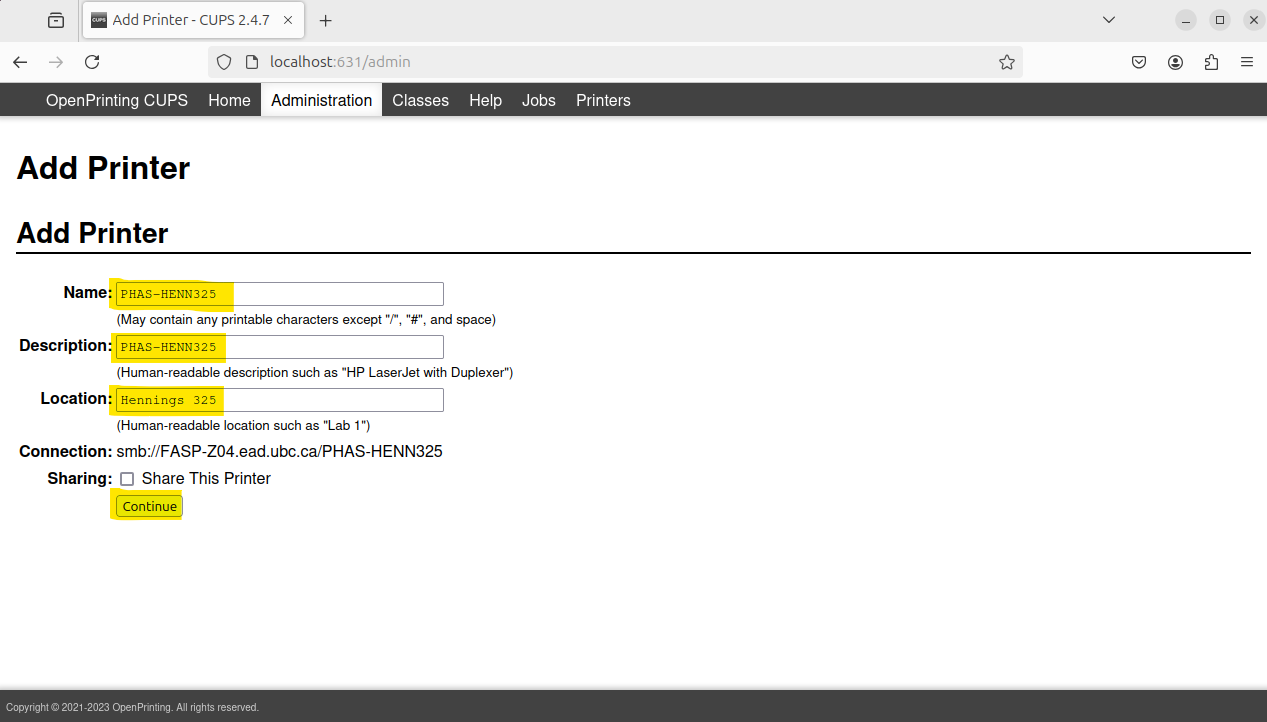
- In the connection textbox, type the printer's network path. Please see printer details for PHAS printer network paths. Click Continue.

- Add printer details. Make sure Share This Printer is NOT ticked. Click Continue.
- From the Make list, select the HP option. Click Continue.

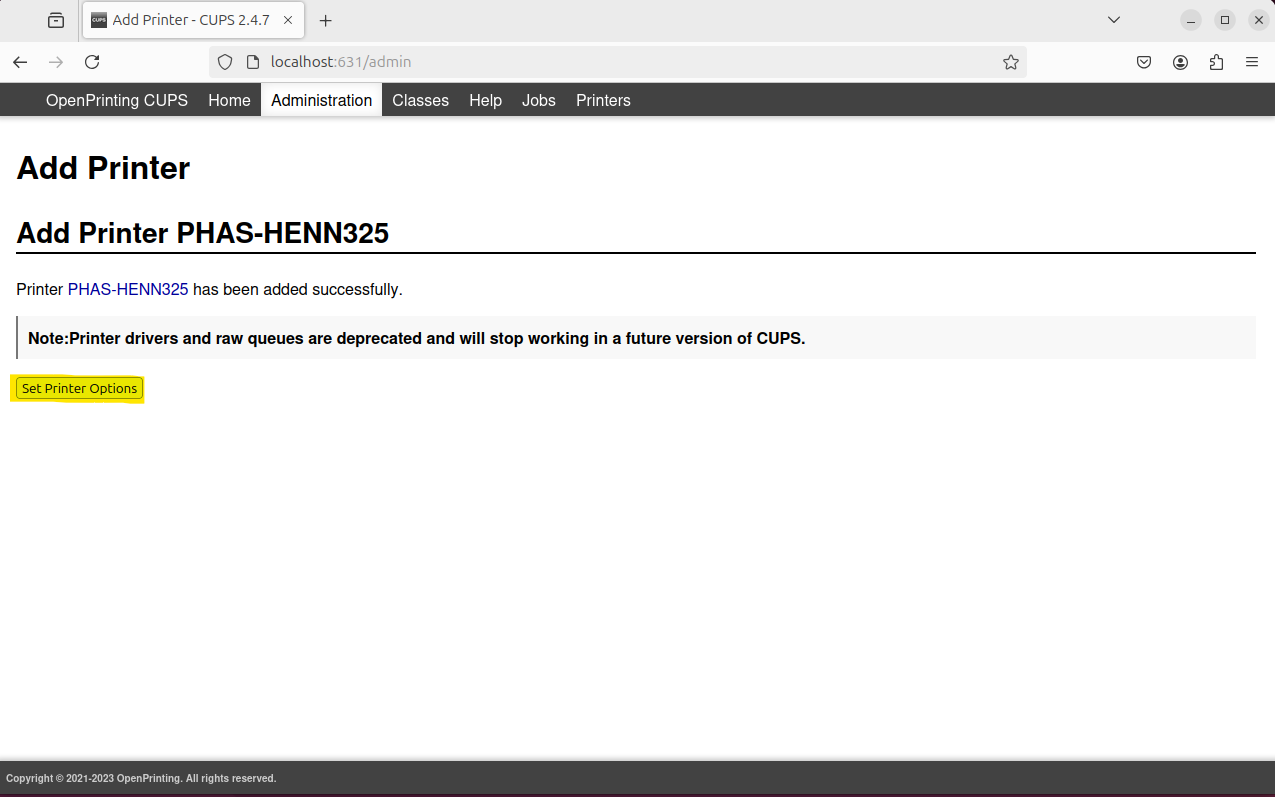
- From the Model list, select the HP Color LaserJet M652 M653 option. Click Add Printer. The printer will be installed.

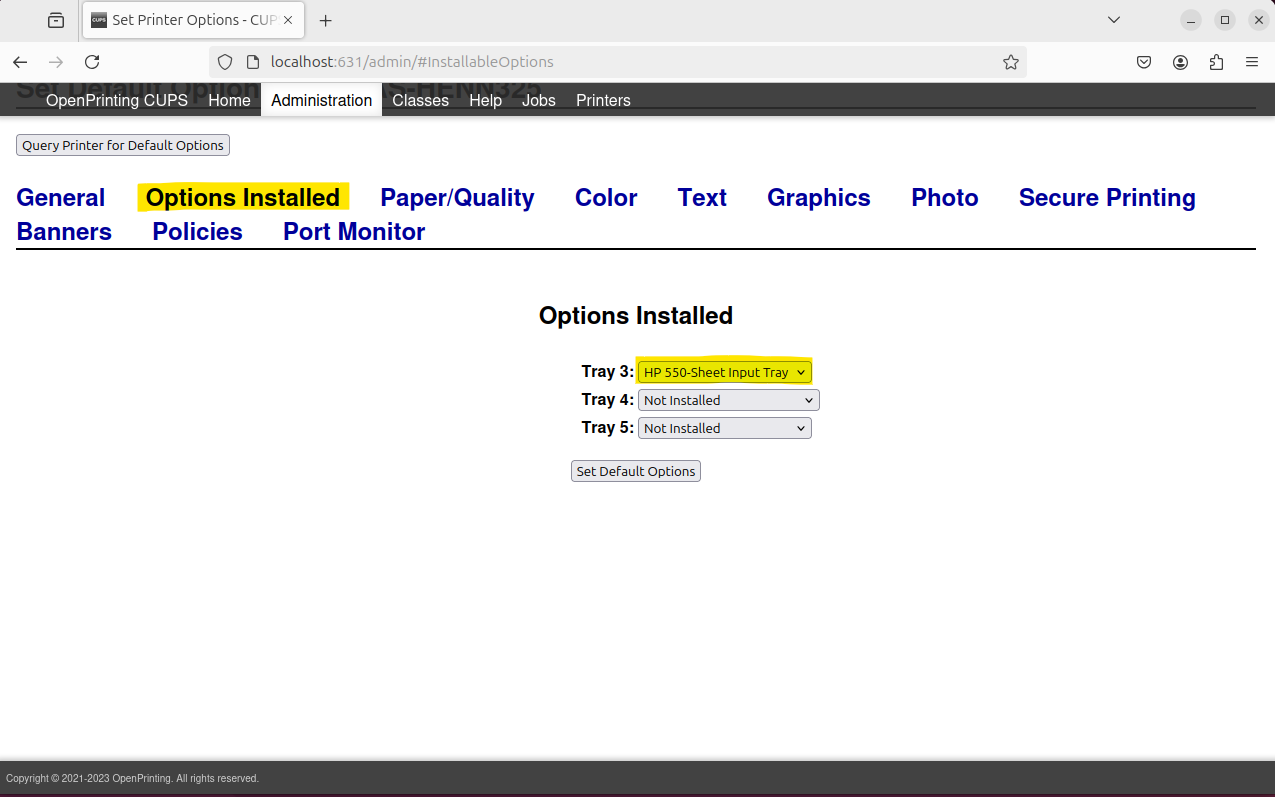
- Click the Set Printer Options button. If you're adding the PHAS-HENN310 printer then continue to next step, otherwise click the Options Installed link and set Tray 3 to 550-Sheet Input Tray.
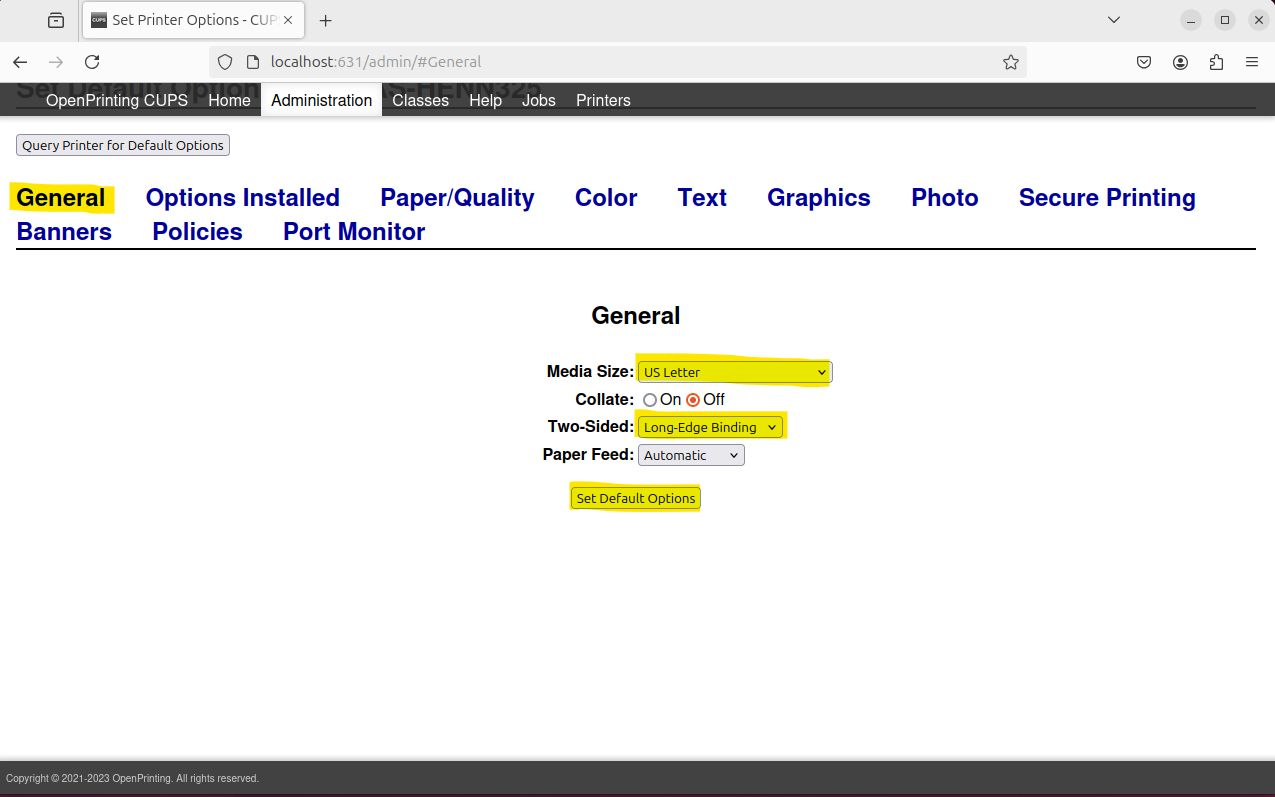
- Click the General link. Set the Media Size option to US Letter. Set the Two-Sided option to Long-Edge Binding. Click the Set Default Options button.
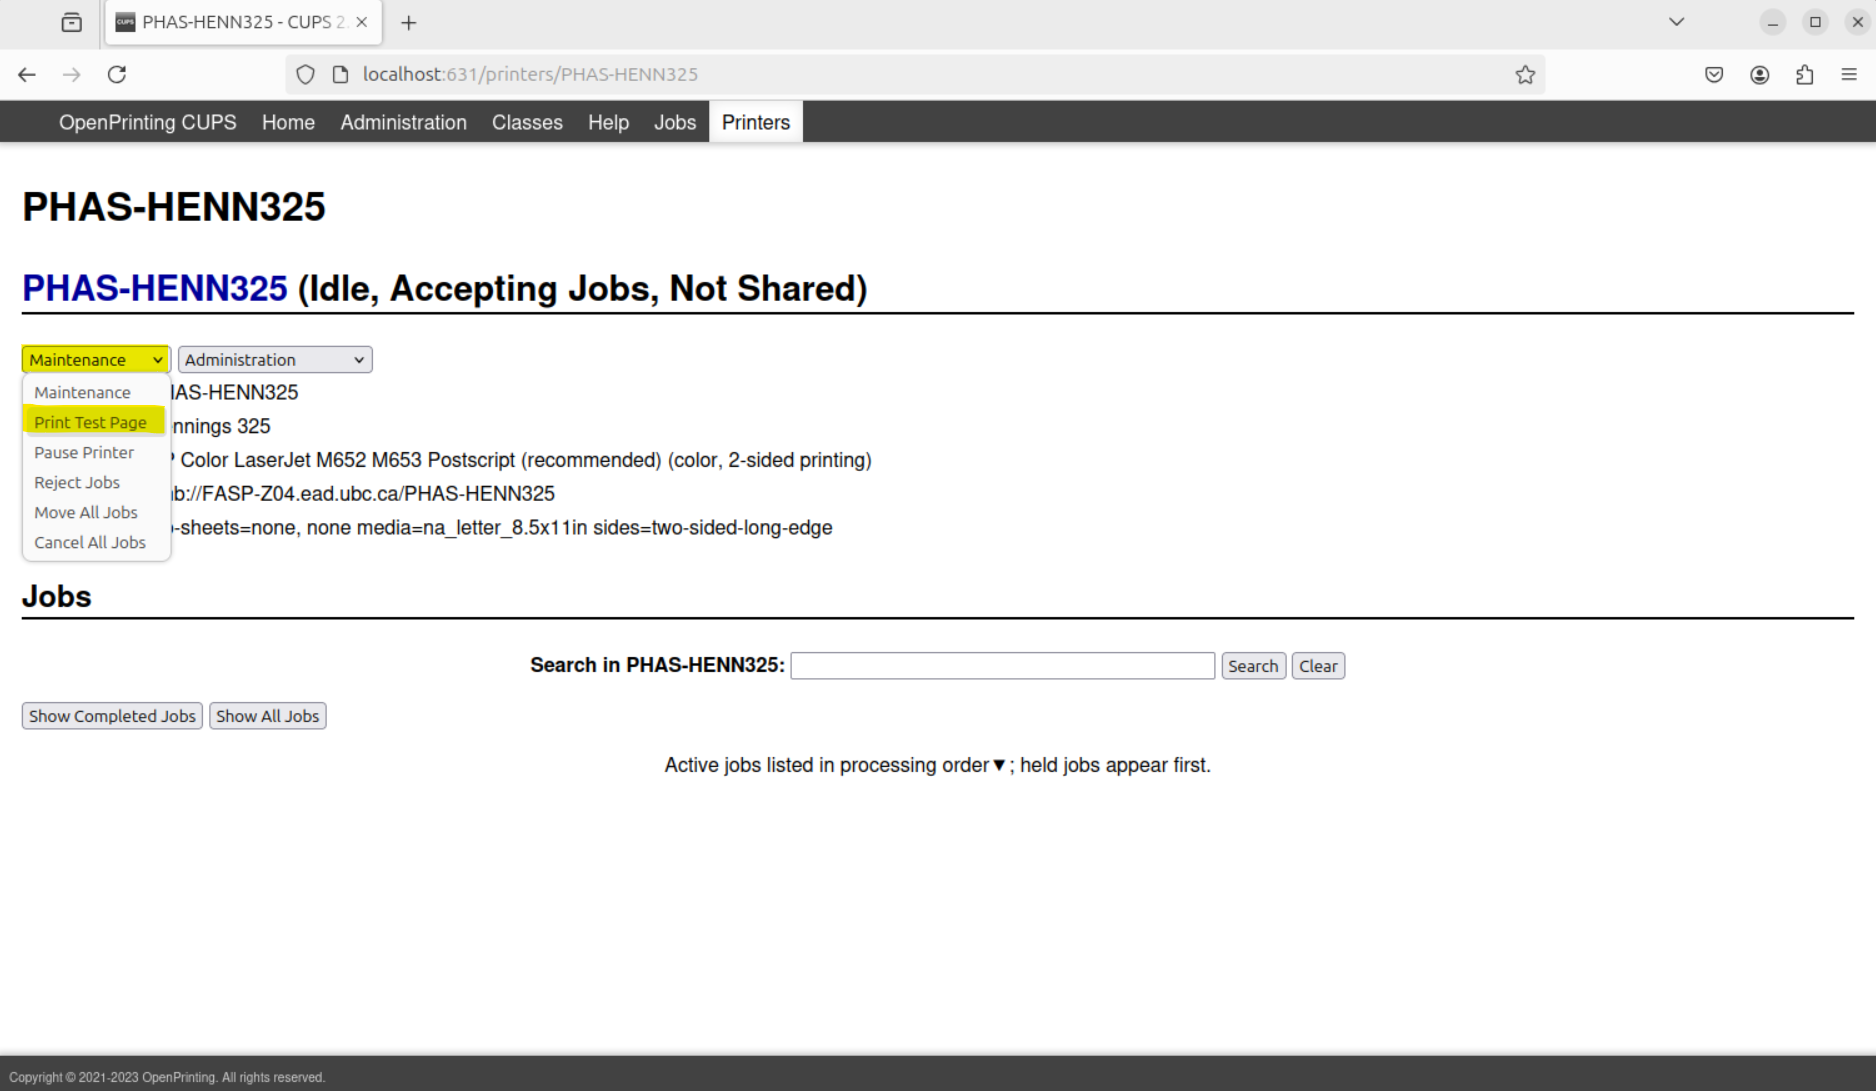
- In the top menu, click Printers. Click the link for the newly installed printer. In the printer's Maintenance drop-down menu, select the Print Test Page option. A test print job will be sent to the print queue, where it will be held.
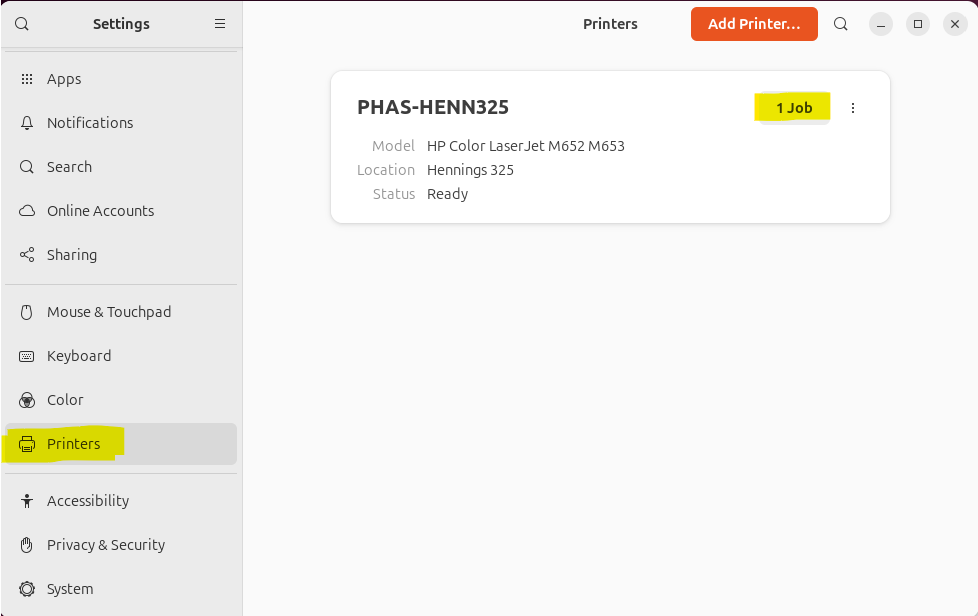
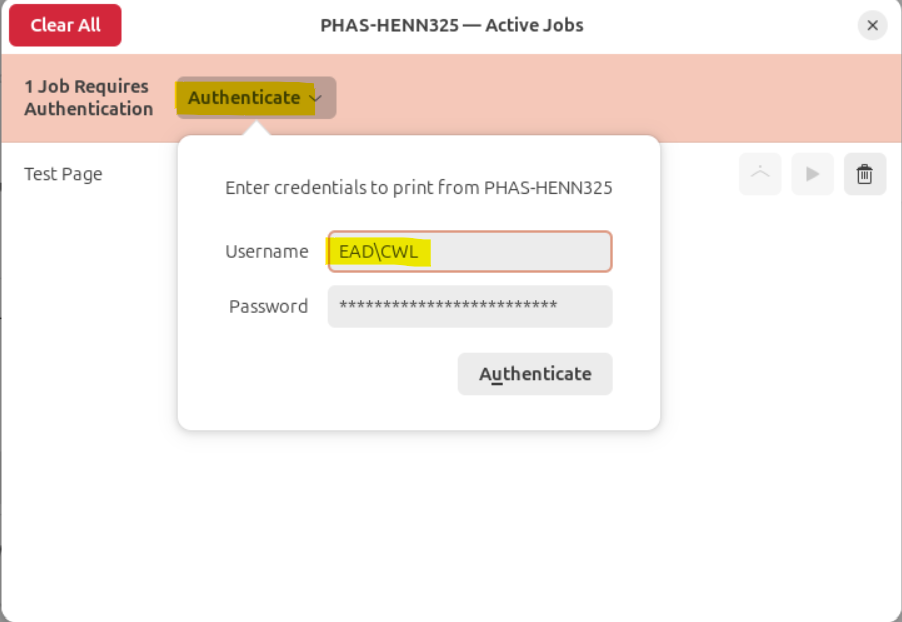
- Open Settings > Printers. In the print queue, click on 1 Job.
-
The queue will indicate the job requires authentication. Click the Authenticate button. You will be asked for a username and password. In the Username textbox, type ead\CWL where CWL is your CWL username, e.g. ead\pumpernickle. In the Password textbox, type your CWL password. Click the Authenticate button.
The authentication step is only needed the first time you print.
- Print queue installation is complete.